Search in this blog

What we know is a drop, what we don´t know is an ocean.
Isaac Newton

Wednesday 20 March 2013

Experiment n.6 - Pressure of alcohol vapours

Hey chemists! We are sure that you will find this lab session really interesting and stimulating. Some colleagues and us worked on the same experiment, but we used different alcohols in order to obtain a range of data. This way, we could represent the data on a graph in order to describe the trend or relationship between the variables. The alcohol that we used was butanol. 

Aim: To determine the pressure exerted by butanol vapours, collect data from different types of alcohols (from other students) in order to  make a graph and determine a relationship between the variables: vapour pressure against the alcohol's molecular weight or number of carbon atoms. The following alcohols will be used: methanol, ethanol, propanol, butanol, hexanol, pentanol,  heptanol and octanol.
Make a plastic model of a molecule of butanol.

Background information

In Chemistry, an alcohol is an organic compound in which the hydroxyl functional group (-OH) is bound to a carbon atom. Butanol is a primary alcohol with a 4 carbon structure and the molecular formula of C4H9OH.


- "Butanol - Wikipedia, la enciclopedia libre." Wikipedia, la enciclopedia libre. N.p., n.d. Web. 21 Mar. 2013. <http://es.wikipedia.org/wiki/Butanol>.

- "Alcohol - Wikipedia, la enciclopedia libre." Wikipedia, la enciclopedia libre. N.p., n.d. Web. 21 Mar. 2013. <http://es.wikipedia.org/wiki/Alcohol>.
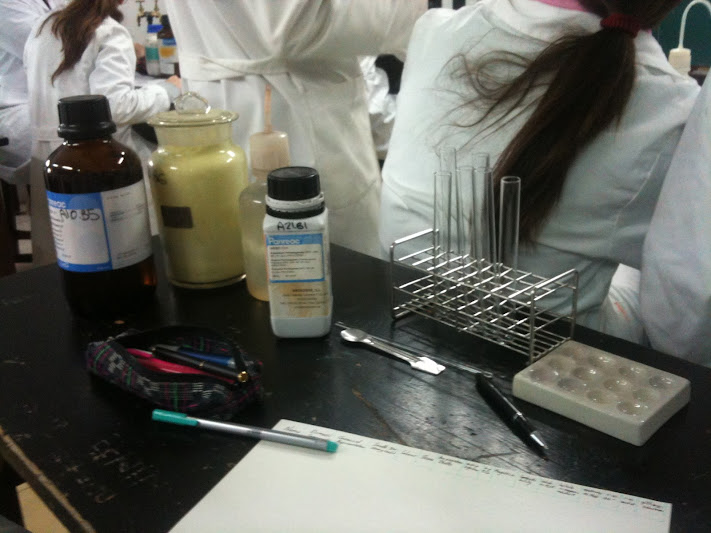


Materials:


1-  A schlenk tube.
2-  Vaseline.
3-  A rubber tube, in order to connect the schlenk tube to the vacuum schlenk line.
4-- A pressure sensor.
5-  2 Rubber bands.
6-  A computer with Logger Pro installed, in order to record the data.
7-  Plastic balls to represent the atoms making up the alcohol. Each color and size represent a different  atom.
8.- Butane.
9.- Vacuum schlenk line.
10.- 1Clamp.
11.- 1 Stand.


Procedure

1. Arrange the schlenk tube with its stopper in the correct way. Vaseline is used to avoid the pieces from getting stuck or blocked. The following video shows how the schlenk tube should look like:


2. Pour the butanol inside the schlenk tube.

3. Using a rubber tube, connect the schlenk tube to the vacuum schlenk line.

4. Turn the stopcock tap that allows vacuum to be selected without the need for placing the sample on a separate line. Create vacuum in the schlenk tube. The butanol will boil because the pressure is lowered in a closed container.

5. Connect the pressure sensor to the schlenk tube, and to the computer, and using the program ‘Logger Pro’, notice that there is actually some pressure. The alcohol has produced a vapour which exerts some pressure.

6. Wait until the pressure reaches equilibrium and write down the result.

7. As different groups used different alcohols, we used all the data in order to make a graph and to figure out the relation between the alcohol used and the vapour pressure.


We observed that the alcohols produce a vapour that exert some pressure. The following video shows how 
we figured that  out: 


Results: The pressure exerted by butanol's vapour was of 5,25 kPa.

Table: Showing the relationship between the pressure exerted by vapours of different alcohols and their molecular mass. 

Graph: Showing the relationship between the pressure exerted by vapours of different alcohols and their molecular mass.


Relationship between variables

The relationship that can be found between the variables on the first graph is that as the molecular weight of an alcohol increases, the pressure exerted by the gas decreases. Therefore, there is an inverse relation between the variables. As the experiment was carried out by students and the results were not very precise and do not seem to be correct, we used a processing data computer program in order for it to draw the best fitting line.

EXPLANATION

Volatile substances tend to evaporate easily. This means that alcohols which are more volatile than others produce more vapour when exposed. Consequently, the vapour pressure of a volatile alcohol inside a schlenk tube would be high.

If we know that i fan alcohol has less carbon atoms, the vapour pressure is higher, it can be said that volatile alcohols have more quantity of carbon atoms tan non-volatile or less volatile ones.

As there are more atoms, it is more difficult for the forces to break (more energy would be needed) in order to obtain more quantity of vapour. As there is a defined space inside the schlenk tube, if more gas is produced in the same space, then, the pressure will be higher.

If an alcohol has more carbon atoms, it looks more like an alkane, a non-polar compound.

When vapour pressure increases (as well as the temperature) to the point at which it is equal to the atmospheric pressure, the liquid will reach its boiling point. As far as intermolecular forces are concerned, the boiling point is the temperature at which the molecules, with enough kinetic energy, are able to ‘overcome’ intermolecular attractions between molecules. This way, the higher the intermolecular attractive forces are, the harder it is for molecules to change to the vapour state and, therefore, the lower the vapour pressure of that liquid. As a conclusion, the higher the number of carbon atoms, the higher the intermolecular attractive forces are and the higher the boiling point is.

The larger the molecule, the greater the number of electrons in it, the more polarizable it is and  so the attractive force is greater.


GRAPHS

We can see that the best fitting line represented on the first graph looks like an exponential  graph and we proved that using Excel as reference program. This would mean that there is not a proportional relationship between the variables. On the other hand, if we look at the graph carefully, it is possible to see that, considering that the results obtained are far from precise or correct, although they are acceptable, instead of a  best  fitting line with exponential appearance, a straight line could be represented. This would mean that there is an inversely proportional relationship between the two variables explained.

Therefore, this has been one of our weaknesses. All of us might have commited some errors, such as not building up the structure correctly at the beginning, or not waiting for the pressure to stabilise and reach equilibrium, which made us obtain rather strange results.


Variables
As the vapour pressure of the alcohols depend on the number of carbon atoms that the alcohols have the dependent variable is the vapour preassure exerted by each alcohol, while the independent variable is the molecular mass of  the alcohols.


The structure of butanol

In the lab, we used different coloured balls in order to build up a butanol's molecule. Each ball, of a different size and colour, represented a different element. We used carbon, oxygen and hydrogen, as those are the atoms that make up alcohols.

The following images show many different shapes that the molecule can adopt.


Conclusions

We came up with many different conclusions. 

-The first thing that we observed, as explained in one of the videos, was the fact that the alcohols that we used produced a vapour that exerted some pressure.

-As a different pressure was obtained when different types of alcohol were used, we also noticed that different alcohols have different vapour pressures. 

-When we built the molecule up we realised that those molecules can adopt different shapes. They are not rigid. 

-We also did some research on the different alcohols and we saw that all of the alcohols used were made up of  the same atom types: oxygen, carbon and hydrogen, but the arrangement was not the same.

-Looking at the pressures of the vapours emitted by the different alcohols, we got to the conclusion that the bigger the molecular mass of an alcohol is, the lower the pressure exerted by the vapour emitted by this gas.

- All alcohols have a common 'template' or 'pattern'. We have a homologous series of elements with the same structure.


Calculations :

rmm carbon: 12
rmm hydrogen: 1
rmm oxygen: 16

 rmm octanol (C8H18O): 12x8+1x18+16x1= 130
 rmm hexanol (C6H14O): 12x6+1x14+16x1= 102
 rmm ethanol (C2H6O): 12x2+1x6+16x1= 46
 rmm butanol (C4H9OH): 12x4+1x9+16x1+1x1= 74
 rmm propanol (C3H8O): 12x3+1x8+16x1= 60

 rmm methanol (CH4O): 12x1+1x4+16x1= 36


Monday 18 February 2013

Experiment n. 5 - Properties of gases

Experiment n. 5
Welcome chemists!
Here we are once more ready to share with you all a new experience!
This week, we studied how the pressure of a gas varies depending on the temperature at which it is subjected to.

Task
To study the pressure of a gas depending on the temperature at which it is subjected to.

Background information


According to Boyle’s law, we would have to double the pressure to halve the volume. Thus, if the volume of gas is to remain the same, doubling the temperature will require doubling the pressure.This law was first stated by the Frenchman Joseph Gay-Lussac (1778 to 1850). According to Gay-Lussac’s law, for a given amount of gas held at constant volume, the pressure is proportional to the absolute temperature.
Gay-Lussac’s Law is expressed as:


   So  P / T = k (constant).

where
Pi = initial pressure
Ti = initial absolute temperature
Pf = final pressure
Tf = final absolute temperature

It is extremely important to remember the temperatures are absolute temperatures measured in Kelvin, NOT °C or °F.


http://chemed.chem.wisc.edu/chempaths/GenChem-Textbook/Gay-Lussac-s-Law-952.html


Procedure
1. Collect the materials and arrange them following the image shown.
2. Pour water inside the container, so that it covers the gas container.
3. Connect the two sensors to the computer: the pressure sensor will be connected to the gas container and the temperature sensor will be inside the water.
4. Place some ice-cubes inside the water in order to cool down the temperature .
5. Turn on  the computer and open ‘Logger Pro’ program. Then, press ‘collect data’, in order to record the first values of temperature and pressure.
6. Then, switch the bunsen burner on to heat the water up. The temperature will start increasing, as the magnetic stirrer will homogenise the temperature of the water that consequently will homogenise the temperature of the gas at the same time and temperature.
7. Press ‘collect’ again, every time the temperature of the water increases about three degrees celsius. Proceed with this procedure until the temperature of the water reaches 100 ºC/273ºKelvin.

Materials:
- Magnetic stirrer with heating.
- Bunsen burner
- Container
- Schlenk
- Water
- Lighter
- Manometer- Tripod
- Clamp
- Stand
- A laptop with the programme “Logger Pro” installed, in order to record the data obtained.


VIDEOS AND IMAGES

Images of the materials used and the system created


Video: Practical explanation of Gay-Lussac's law using a balloon (well, rather a glove...)


Results: Graph and table

Table: Representing the pressure in hPa of a constant volume of gas in relation with its temperature in ºC.


Graph 1: Representing the pressure in hPa of a constant volume of gas in relation with its temperature in ºC. (original data)


Graph 2: Representing the pressure in hPa of a constant volume of gas in relation with its temperature in ºC (best fitting line)


Conclusion
After carrying out the experiment, and looking at the results recorded, we got to the conclusion that there is a directly proportional relationship between the pressure of a gas and the temperature it is subjected to, keeping the gas volume's constant, what proves Gay - Lussac’s law:


On the graph we can observe the following: R^2= 0,9974. In order for the experiment to be perfect, the number should be 1. But, although it is not exactly one, it is quite close. This means that our results are quite good.
It can be seen that the function represented is a lineal function.

In order to improve the results, as we had to collecr the data following a 'pattern of degrees' (we had to click on 'collect data' using the data processing program that we used everytime that the temperature increased a specific number of degrees celcius), and we sometimes commited errors, we should be more precise and careful when collecting the data.

On the other hand, we are happy to have used this new program and we consider it very appropriate and useful, as having such an interphase and sensor system connected to the computer which uses a data processing special program to collect the data, makes it a lot more easy to collect the data (which is collected more precisely) , and much quicker too. If we had done it by hand, the process would have been much longer, the fact that we would have had to draw a hand-made graph would have also made it slower and much less precise. And, by using 'Excell', we have even been able to calculate our error and to see how well or how wrong the experiment went.


Sunday 10 February 2013

PLEASE READ

Dear chemists.

The last post explains the second experiment done, which has been posted now due to technical difficulties. The latest lab experiment, the one done this last week, is found under the 2nd experiment's post.

Thanks for reading chemists!!!

Properties of substances, elements and compounds.

Welcome chemists!!! How are you today?
Here we are once more with our second experiment of the year! Ready to share it with you all.
Today we are going to study some of the main characteristics of sulfur and potassium permanganate.
Please, have a look at the following list containing all the properties that will be studied:
1- Element or a compound.
2-Chemical representation.
3- Smell
4- Colour.
5- Shine
6- Aggregation state.
7-Melting point.
8-Boiling point.
9-Magnetism.
10- Combustibility.
11-Solubility in water.
12-Solubility in organic solvent.
13-Reaction Vs. water
14-Reaction Vs. OH-
15- Reaction Vs. H+
16- PH in aquoeus solution.


You’ll find the results that we obtained.


BRIEF EXPERIMENT EXPLANATION

AIM:

To study the main properties of sulfur and potassium permanganate such as their combustibility, magnetism or their solubility in water (among other things).

In the following website  you can find the properties of sulfur:

http://www.chemicool.com/elements/sulfur.html

The following photograph shows the main properties of potassium permanganate:


MATERIALS :

The image shows the materials we have used for this experiment: beakers, water, sulfur and potassium permanganate. We also used a burner to test the combustibility of the substances and a thermometer to measure their boiling and melting points. We used a pH indicator to test the  pH of this subtances in aqueous solutions.


*Note: We used a porcelain dish in order to observe the reactions, such as combustibility and acidity or basicity.


PROCESS :
1- Look for information or look in the labels of the bottles if our subtances are elements or compounds.
2- Smell the subtances and record our results in the data.
3- Observe both subtances and determine their shine , aggregation state and colour.
4- Take a test tube and mix each subtance with water, an acid and a base in a beaker.
-We poured water in a beaker, and then added some sulphur but nothing happened. Sulphur does not dissolve in water and it does not react. However there was reaction between the potassium permanganate and water. Potassium permanganate dissolves in water and produced a dark purple coloured solution.  
5-To test the pH of each subtance in aqueous solutions.
6-We burned the sulfur and we couldn´t see any flames but a reaction took place and we explain it in the following video:


Conclusions:

As a conclusion, it is possible to work out and to study the different properties and characteristics of elements and subtances in the laboratory following a simple and easy procedure and using common equipment. On the other hand, it is important to take into account that some of the equipment might be dangerous when using it. We, as a group, think that in order to check a series of characteristics or properties such as combustibility correctly and safely, the process of burning the substance up should be carried out in a totally controlled environment, avoiding any risks and wearing safety equipment such as the lab coat or lab goggles.


IMAGES AND VIDEOS


Image showing all the equipment used and the table created


Image showing sulfur, the pure element that we worked with


Image showing potassium permanganate. This dark purple compound reacted with water, as the solution turned transparent-purple.


pH indicator paper used in order to determine the acidity or basicity of the compounds.


Video explaining properties: Reactions in water 


This video is longer, but contains more information


Saturday 9 February 2013

Copper - Zinc Galvanic Cell

Welcome chemists!!!
As promised, here's our weekly experiment. This experiment has been carried out after having learned about REDOX reactions.

JUST BEFORE THE START

This is a good rule to remember REDOX reactions: OIL RIG (Oxidation is Loss of electrons and Reduction is Gain of electrons)!! Oh, by the way... Just in case you don't know about that REDOX stuff... Here's a fantastic website which explains it perfectly.

BACKGROUND INFORMATION:


"The flow of current is the flow of ions from the more reactive metal to the less reactive metal. The ions moving from one electrode to the other creates an electrical charge which is neutralised by the flow of electrons across the wire.
When we place a single metal electrode in an electrolyte some of the metal atoms in the electrolyte go into solution as ions while the remaining electrons create a negative charge on the metal. The separation of ions and electrons leads to a separation of charge. However, this build up of charge cannot continue indefinitely because as the negative charge builds up in the metal it becomes increasingly difficult for positive metal ions to go into solution. A similar build up in positive charge in the electrolyte also prevents the build up of charge. This degree of charge build up depends on the metal and represents the work required to separate electrons from the ions. This is known as the electroneutrality principle.

If a copper strip is placed in an aqueous copper (II) sulfate solution the copper will also lose ions. These reactions are often written as Cu+2 | Cu this is the half-cell reactionThe tendancy for zinc to lose ions is greater than that of copper. When the two cells are joined together, the build up of electrons on the zinc will flow to through the wire onto the copper. " - Reference 1


AIM:  To create a battery, obtaining energy from two redox couples with the use of a salty bridge (ionic bond) as an intermediary.

MATERIALS:                               REACTANTS:

- 100 mL beaker (x2)                      - 20 mL of 1M CuSO4     +      60 mL of H2O
- U-Tube                                         - 20 mL of 1M ZnSO4     +      60 mL of H2O
- Multimeter
- Cotton
- Strip of zinc
- Strip of copper
- Salty water (NaCl + H2O)
- Water

PROCEDURE


1.- Pour 20 mL of 1M CuSO4  and 60 mL of H2O in one beaker. 

2.- Pour 20 mL of 1M ZnSO4   and 60 mL of H2O in a different beaker.

3.- Create a salty bridge by filling 1/3 with salty water (NaCl + H2O) and the rest with water. Create stoppers by locating 2 cotton pieces at each end of the salty bridge. 

4.- Clamp the copper string, using the voltmeter clamp, and place it into the copper solution. The clamp itself must not make contact with the solution. Do the same with the zinc strip in the zinc solution.

5.- Switch the multimeter on.

6.- Make a connection between the two beakers with the salty bridge, by placing one of the arms inside the copper solution and the other one inside the zinc solution.

7.- A charge will be recorded in the multimeter. Collect the data.

RESULTS: We obtained 14,32 millivolts in the multimeter.

Conclusions related with the results: When the U-tube containing the salty solution was absent, there was no reading on the multimeter, whereas when the salty bridge connected the two solutions, a number was recorded on the multimeter. The direction of the flow of electrons goes from the zinc beaker to the copper beaker.

CONCLUSION: 
                                                                                                                           
As a conclusion, it is possible to create a battery out of two REDOX couples. 
Redox couples are willing to give energy, as it has been demonstrated. We have been able to create a copper - zinc galvanic cell with zinc and copper REDOX couples.

                                                              2+                       2+
                                                                         Cu  /  Cu     Zn  /  Zn

As the image shows, and knowing the standard reduction potentials for the two half-cells given at the bottom of the following image :


Image reference 1

We can  therefore deduce that the copper strip is the cathode and the zinc strip is the anode. To conclude, when a copper sulphate solution, connected to a copper strip, and a zinc sulphate solution, connected to a zinc strip, are connected by a salty bridge, a reaction will occur in each of the sides or beakers. The chemical energy produced by the redox couples has been transformed into electrical energy.


The two bars represent the salty bridge. 

REFERENCES: 

1.- In Electrical Cells and Batteries. View: 09/02/2013. Extracted from:

Image reference:  In Electrical Cells and Batteries. View: 09/02/2013. Extracted from:

IMAGES

Image showing salty bridge


                  Image showing an example of a galvanic cell before we carried out our individual experiment

     
                                      Image showing the equipment used for the experiment


                                          Image showing our galvanic cell!!!
VIDEOS


                                            Video 1: Explaining the experiment


                              Video 2: WHAT IS REDOX? Real example of reduction and oxidation.


Monday 28 January 2013

Redox Titration Experiment

Welcome chemists!!! 
 Here we are again! Ready to share our second experiment with you all. 
After having learned about the different characteristics that can be found by looking at the labels of different substances containers, and after having studied properties of different elements and compounds, as shown in the following table.
 ... we have carried out a marvellous, an incredibly curious and interesting experiment... YES! We made colour disappear! You will learn about it now... It is not magic... It is Chemistry! 

BACKGROUND INFORMATION

First of all... What is REDOX?

A Redox reaction is defined as that where an electron transfer occurs and at least one element chanes its oxidation state. In a redox reaction, there are alweays two coupled processes: one oxidation and one reduction:

. Oxidation is loss of electrons
. Reduction is gain of electrons.

The element which gets oxidised gives electrons to the other, reducing it. It is therefore the reductant. The one that takes the electrons and therefore gets reduced is called the oxidant.
In order to know what species is being reduced or oxidised, it is important to work out the oxidation state of the elements at both sides of the equation. The oxidation state of an element is defined as the hypothetical charge an atom would have if all its bonds to different atoms were 100% ionic.


A redox couple is the set composed by the oxidized and reduced forms of a determined
species. Ex: Zn2+/Zn0, Cu2+/Cu0.


BRIEF EXPERIMENT EXPLANATION 
AIM: 
To record the amount of aqueous potassium permanganate (0,05 M), required for the compound to stop reacting in 4 mL of commercial hydrogen peroxide and 4 mL of commercial sulphuric acid.

We will also determine which is the limiting reactant, as well as the excess. In order to work this out, we will do a series of calculations.

 ------ Please, find the images and videos on the following post ------ 

REDOX TITRATION MATERIALS 

- Beaker
- Test tubes
- Burette
- Pipette
-Sulfuric acid (4M)
- H2O2
- Aqueous KMnO4 (0,05 M)

PROCESS
1. First of all, we fill up a 100mL burette with 80mL of aqueous KMnO4 (0,05 M). It is important that the tip of the burette under the stopcock is full of liquid, so that, when releasing the solution, we have control over the exact quantity that is being released. Therefore, adjust it to 0.

2. In a beaker, prepare a solution of 4mL of 4M H2SO4 and 4mL of H2O2. Place it under the burette. 

3. Opening the burette's stopcock, start releasing the potassium permanganate aqueous solution into the solution in the beaker. Do the process slowly, almost drop by drop.

4. A reaction will take place. As the KMnO4 mixes with the solution, shaking the beaker with your hand, the pink/purple colour will start disappearing, being the solution colourless, due to the two compound's reaction. 

Note: Potassium itself is colourless, it is MnO4(-2) what gave the solution the purple colour.


5. A moment will be reached in which the two solutions will stop reacting with each other, and the final solution will start adopting a pink colour. Record the exact volume of potassium permanganate released when the first drop of the KMnO4 solution stopped reacting in the solution, producing the light pink colour. This is why it is important to release the KMnO4 aqueous solution carefully. 

OUR RESULTS: In our experiment, both solutions stopped reacting when we added 26,6 mL of aqueous KMnO4.

MATHEMATICAL CALCULATIONS
                                                                                H2SO4
1 .- To balance de redox equation: H2O2 + KMnO4  ----------> O2 + MnSO4

Oxygen is being oxidised and manganese is being reduced. The balanced equatino would be as follows:

5H2O2 + 2KMnO4 + 3H2SO4  ----->  5O2 + 2MnSO4 + K2SO4 + H2O

We used 0.05 M KMnO4  and the reaction stopped when we poured 26.6 mL of potassium permanganate during titration. Therefore, we can calculate the number of moles: M = n/V ---> n = M x V --->
0.05 x 0.0266 = 0.00133 mol = 1.33 mmol of KMnO4

What we deduced previously from the experiment was that the reaction had stopped because there was an excess of KMnO4 and consequently, a lack of H2O2. By looking at the ratios of the balanced equation, we can say that:

nH2O2 = nKMnO4 x 5/2 --->1.33/2 x 5 = 3.325 mmol of H2O2.

If we have used 4mL of H2O2, we can calculate the concentration: M = n/V --> M = 3.325 mmol / 4mL = 0.83125 M H2O2

The concentration of H2O2 is measured in volumes. 'Volume' of O2 produced by a given volume of liquid H2O2. Commercial H2O2 has 10 volumes - 1:10
If we have 4mL of H2O2 we should obtain 40 mL of O2. We know that we obtain 3.325 mmol of O2 (ratio: 5H2O2 --> 5O2).


Conclusion

In this experiment, we have understood the theoretical contents learned in class by carrying out a practical experiment. We have studied the concepts of limiting reactant and we have learned how to determine the limiting reactant and the one in excess. What is more, we have learned how to use easy formulas and carry out a series of calculations in order to obtain the number of moles of potassium permanganate used, and we have compared our results with other students.

We consider that one off our strengths was that we released the potassium permanganate solution very slowly so that we knew exactly the precise volume of the solution that stopped reacting.


IMAGES


Image showing the potassium permanganate container. The solution was an aqueous potassium permanganate (0.05 M)


                                                         Image showing all the materials used.


Image showing the potassium permanganate aqueous solution (0.05 M)


                                                         Level of burette adjusted to 0


                                   Pouring potassium permanganate aqueous solution inside the burette


                                          Video 1: Limiting and excess reactants explanation


                                                        Video 2: What happened...?